Securing NestJS with Keycloak
By Hanut Singh Gusain on 12/23/2021
There are plenty of ways to secure your NestJS applications including wonderful libraries like passport that offer multiple strategies for authentication. While they do offer a lot in terms of flexibility, some times its just better to use a battle tested, off the shelf IdP such as Keycloak
In a previous post Getting Started With Keycloak we went over some of the advantages of using an IdP and also how to setup Keycloak locally using docker.
Today we being our journey into securing a NestJS application with Keycloak.
Create the NestJS application
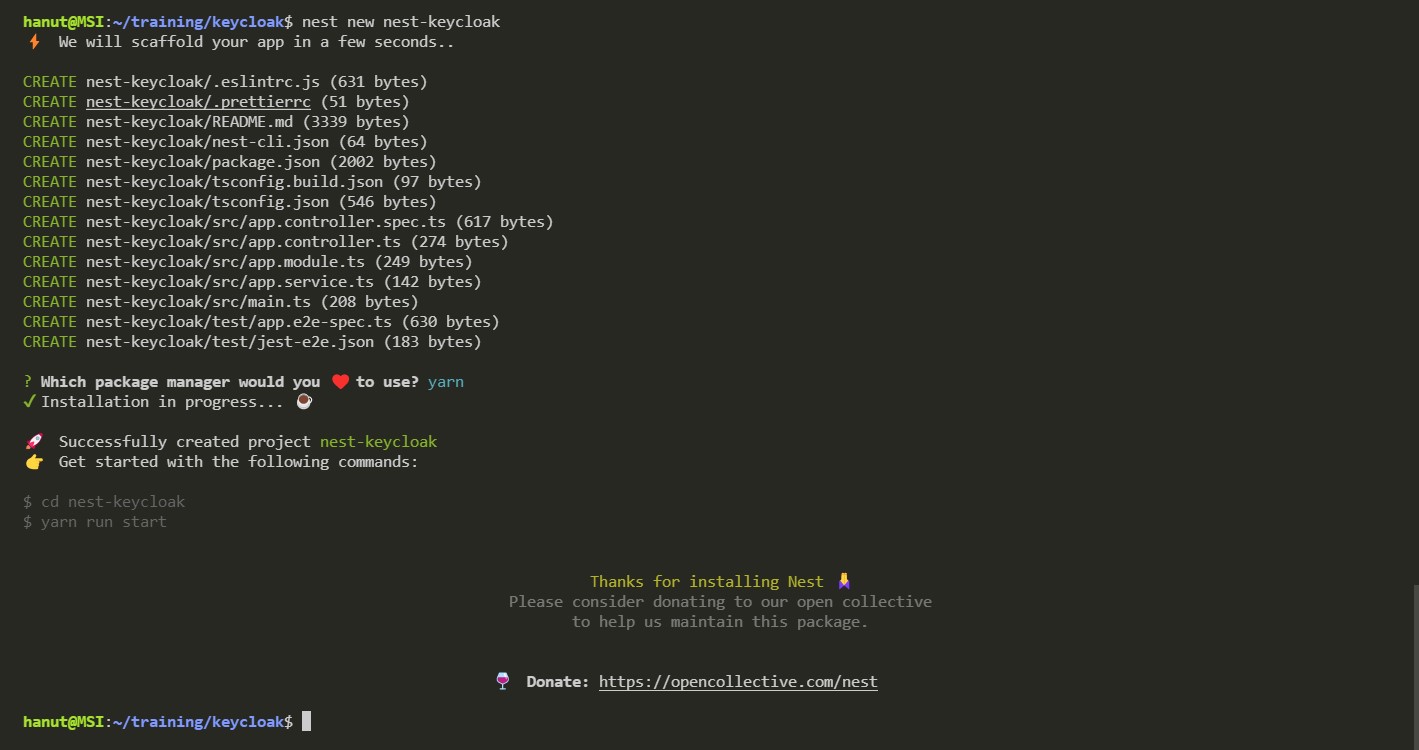
Before we move ahead with integrating Keycloak, we need a NestJS project to work with. Lets quickly bootstrap a nest application using the nest cli command -
$ nest new nest-keycloak
Now that we have a project, lets setup a few endpoints. Our api is going to provide users with access to a list of made of crypto currencies and will provide admin users with endpoints for adding/removing currencies.
We will also add OpenApi 3 for api documentation and checking our endpoints. First install the dependencies
$ cd nest-keycloak
$ yarn add @nestjs/swagger swagger-ui-express
Now just add the open api config in your main.ts file to initialize swagger.
async function bootstrap() {
  const app = await NestFactory.create(AppModule);

  const config = new DocumentBuilder()
    .setTitle("Crypto Api")
    .setDescription("A simple api to work with a crypto currency list")
    .setVersion("1.0")
    .build();
  const document = SwaggerModule.createDocument(app, config);
  SwaggerModule.setup("explorer", app, document);

  await app.listen(3000);
}
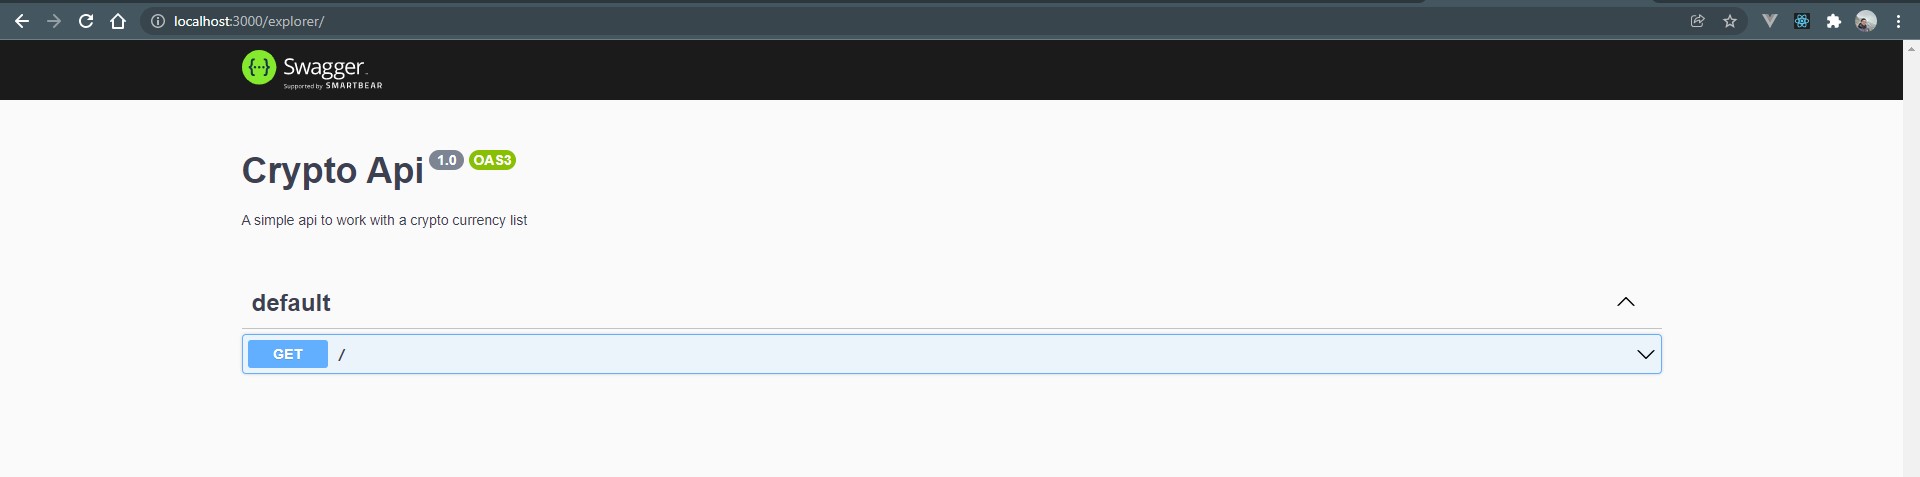
If you open your browser and navigate to localhost:3000/explorer you will now see the open api docs as shown below
Now we can the endpoints to the app.controller.ts file. For the sake of brevity, I am skipping the code and instead am sharing a link to the bootstrapped project on Github - NestJS+Keycloak Sample Project
After cloning it, you can run it to see the endpoints in the explorer
$ yarn start:dev

Configuring Keycloak
There are several steps we need to follow in order to start integrating our Keycloak authentication server.
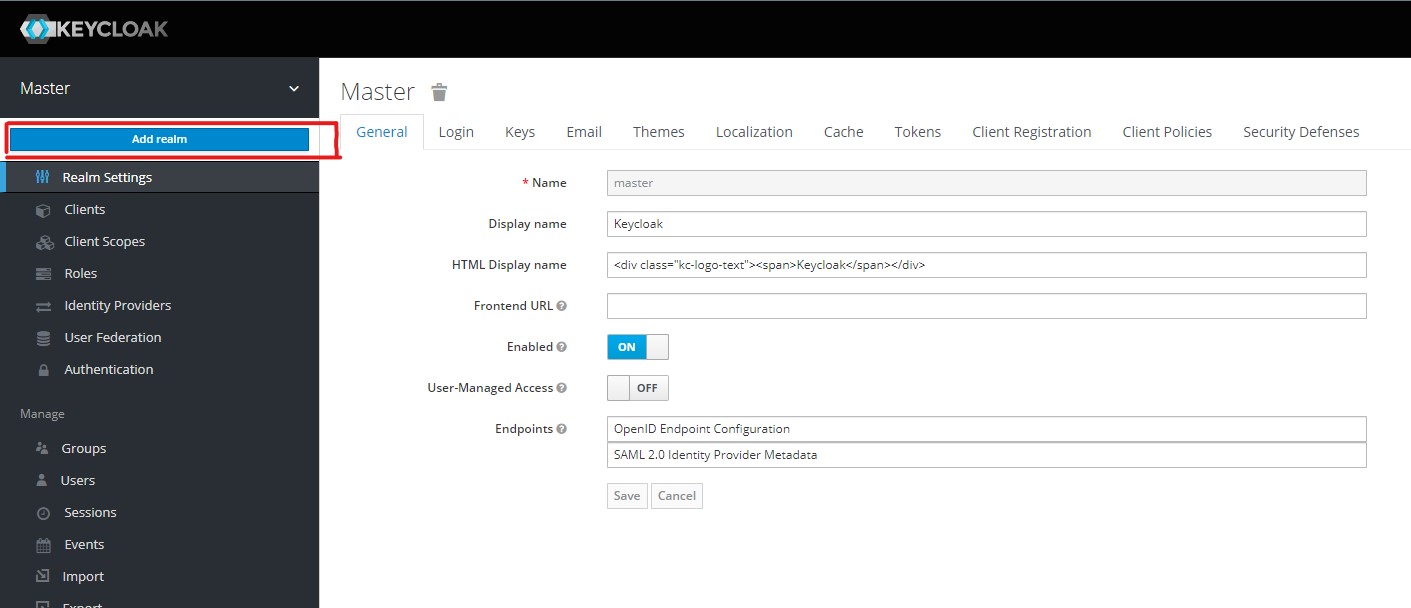
1. Understanding & Creating Realms
Realms separate and hold security meta data for a set of users, applications and OAuth clients. This includes the users themselves, roles that can be assigned to these users (for RBAC authorization systems) and also the mapping of the users to these roles.
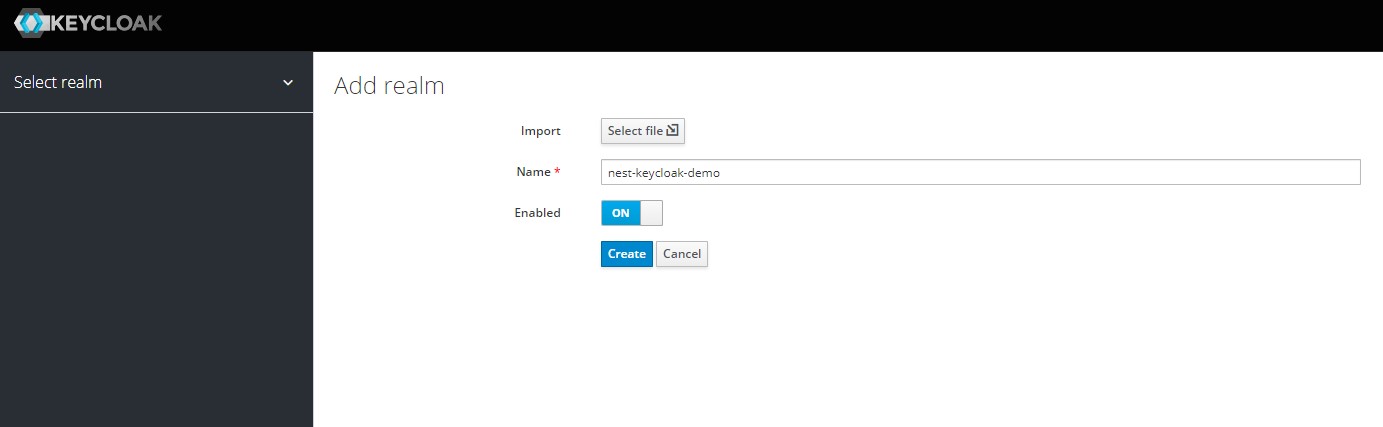
Login to your Keycloak administration web portal and click on the Add Realm button to open the Add Realm page.
Now just add a name of your choice and press the Create button.
This will create the new realm and take you to its settings page where you can configure the different settings that affect the realm such as email configurations, how long a session can idle etc.
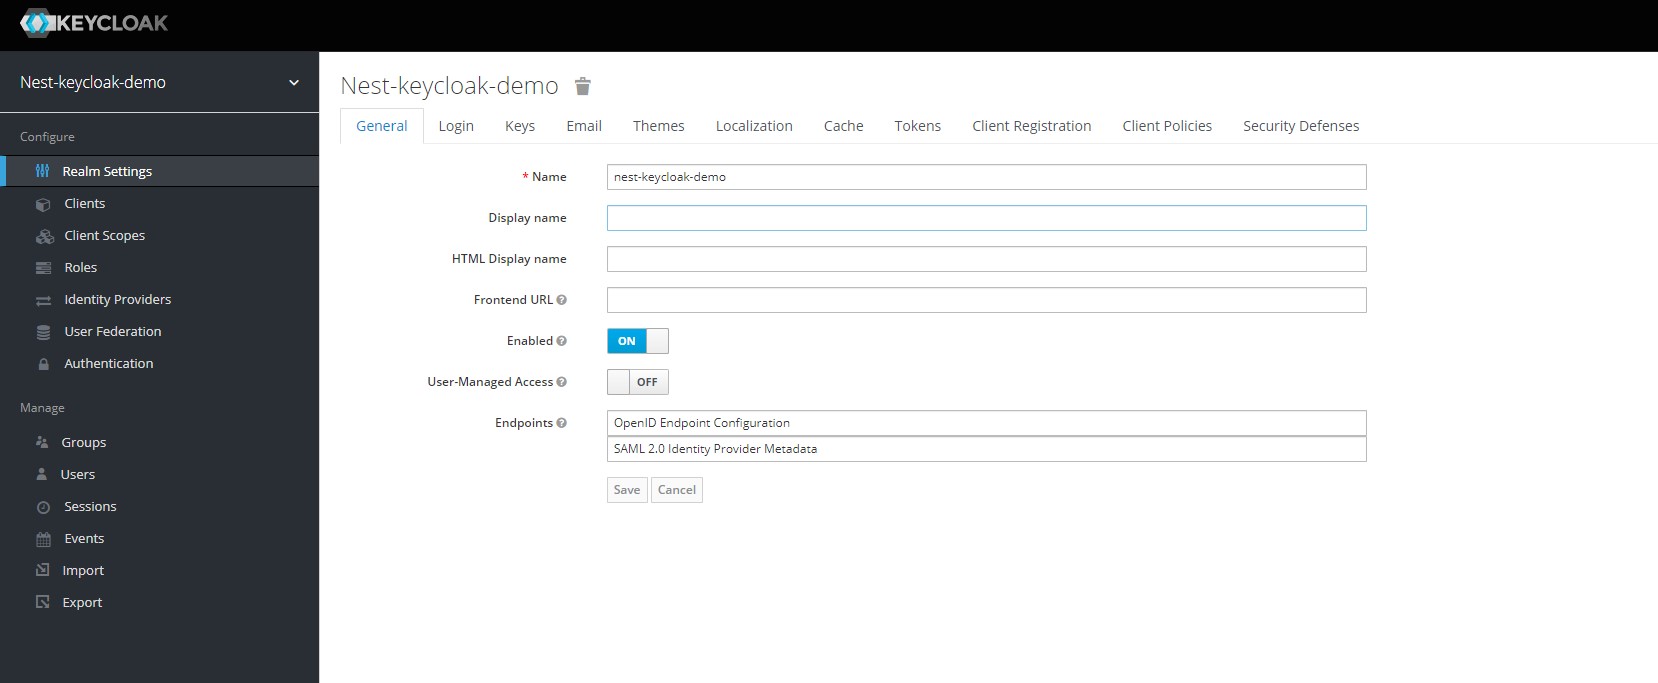
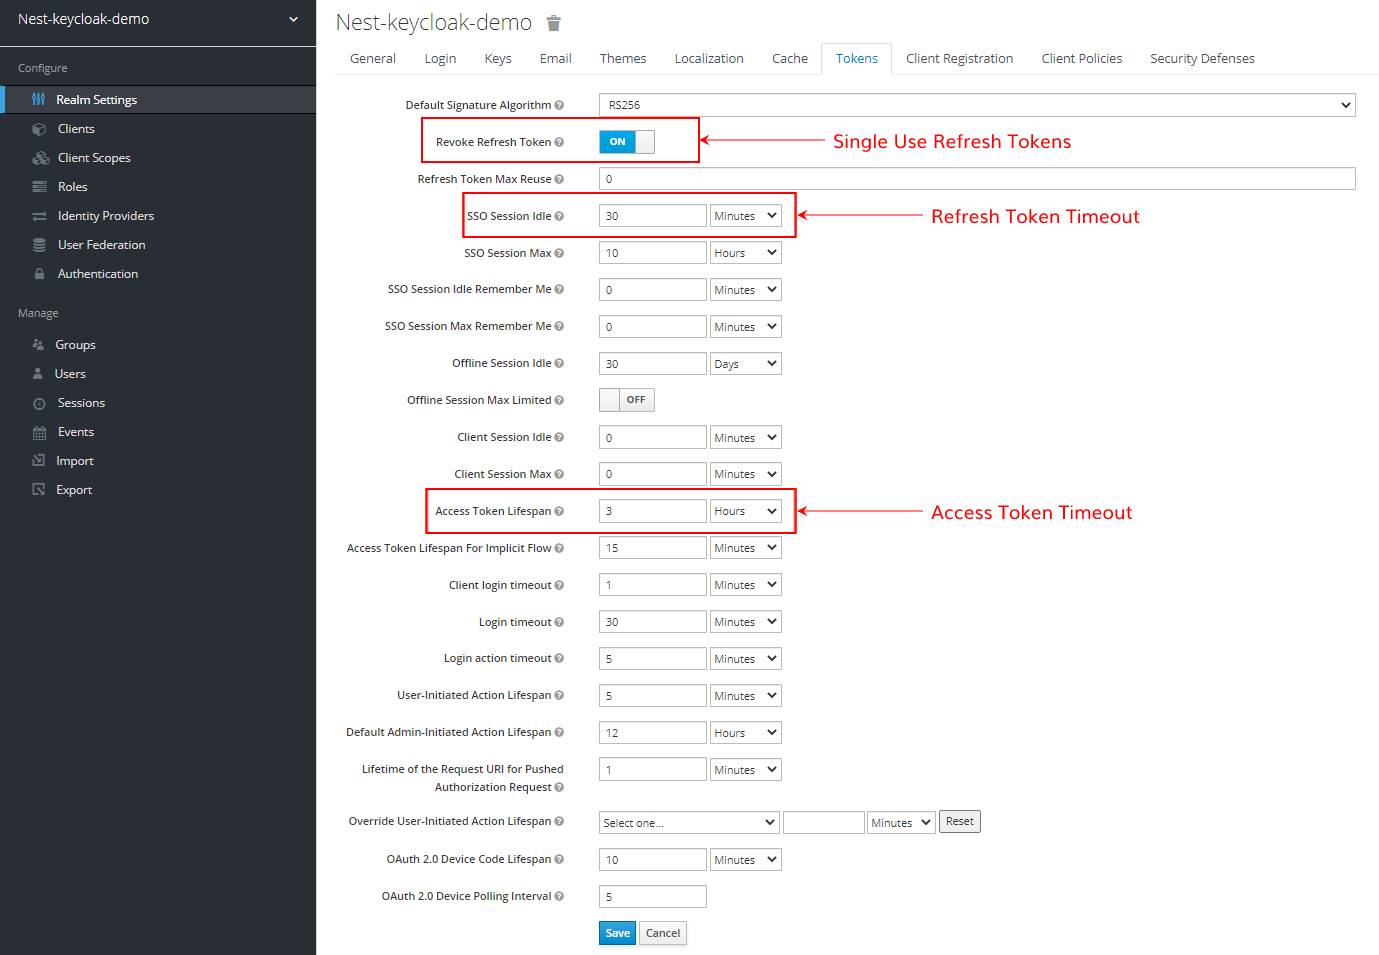
Click on the Tokens tab to see the configured lifespans of your user sessions and tokens
PLEASE NOTE - From here on the guide will assume you are using the realm we just created and setup. Please ensure you use this one and in general avoid using the master realm.
2. Setting up a Client for our application
When working with Keycloak, clients are what let your applications and services talk to Keycloak and perform tasks such as -
- Implement Single Sign On and secure themselves
- Request Identity information
- Request access tokens to call other services protected by Keycloak
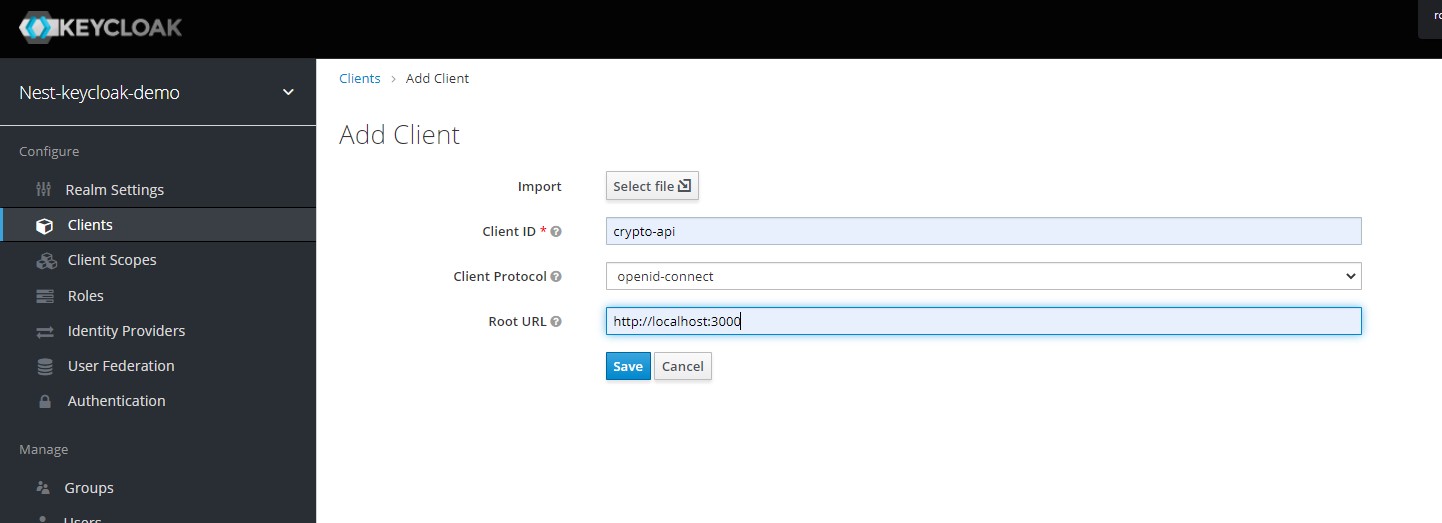
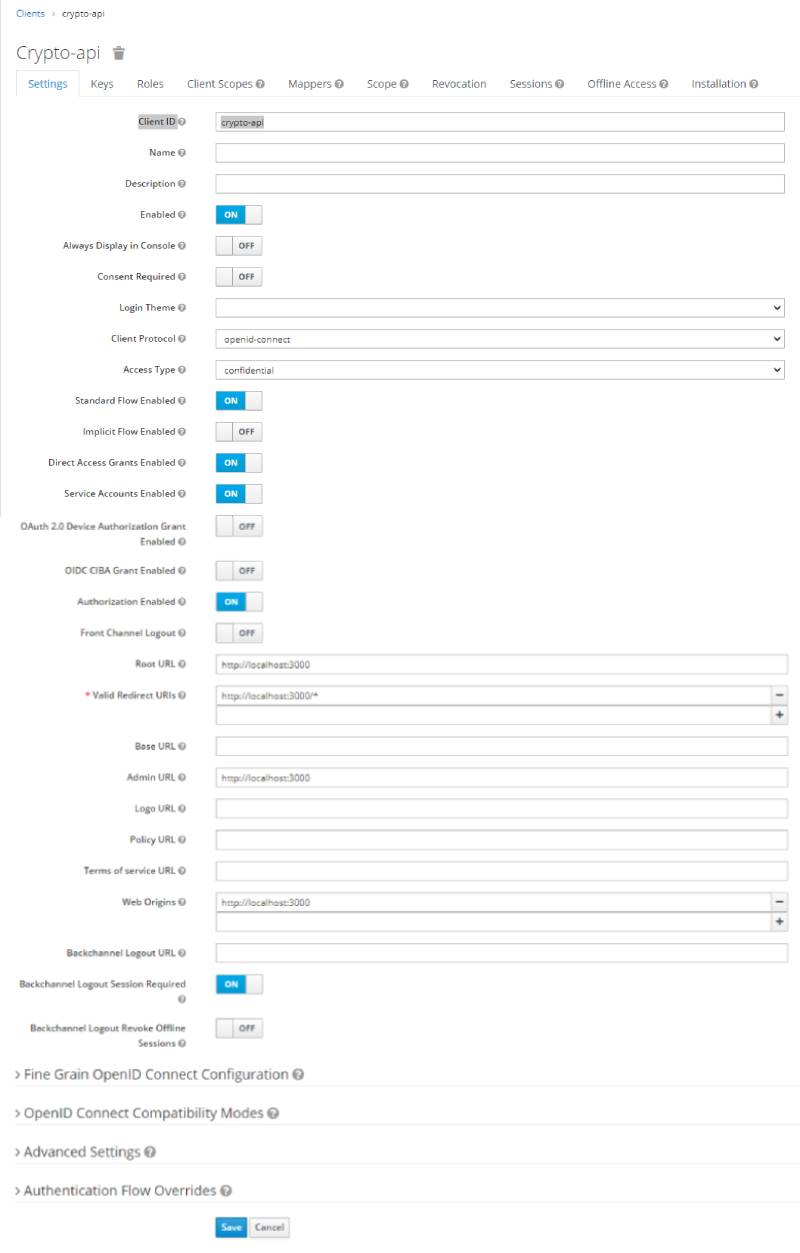
From the menu on the left, select the Clients option which will take you to the clients page. On this page, we can create a new client for our NestJS application by clicking on the create button. This takes us to the Add Client page where we can fill the form to create a new client. For now, ensure you use the openid-connect as the Client Protocol. We will handle SAML in another post. Dont forget to enter a root url that points to your resource server, ie. our nest application.
Click Save to continue and you will be redirected to the details page of your new client. Here we need to set the Access Type field to Confidential and turn the Authorization Enabled switch on before clicking Save. The access type specifies what kind of client we are using and has 3 possible values -
- Public - This is for insecure clients that are not able to secure their secrets eg. frontend Javascript apps.
- Bearer Only - This type of access is best suited for backend applications that cannot/should not perform a login on their own. It is akin to the service clients used in GCP & AWS for providing secure access to backend apps.
- Confidential - This is generally used for OAuth based flows where the clients need to share a secret for initiating the login process.
After updating the updating the access type, you should now see an Authorization tab. It contains additional sub-tabs covering the different steps that you must follow to actually protect your application’s resources -
- Settings - General settings for your resource server. For more details about this page see the Resource Server Settings section.
- Resource - From this page, you can manage your application’s resources.
- Authorization Scopes - From this page, you can manage scopes.
- Policies - From this page, you can manage authorization policies and define the conditions that must be met to grant a permission.
- Permissions - From this page, you can manage the permissions for your protected resources and scopes by linking them with the policies you created.
- Evaluate - From this page, you can simulate authorization requests and view the result of the evaluation of the permissions and authorization policies you have defined.
- Export Settings - From this page, you can export the authorization settings to a JSON file.
3. Setting up Role Based Access Control (R.B.A.C)
"Not all users are created equal, some of them are admin."
Role based access control allows you to provide selective access to different functionality based on what Role a user has. Micro managing permissions and access on a per user level is generally not worth the effort and most applications can be designed using a Role based approach where users are assigned roles based on what parts of the applications they can reach/use.
Here is what the Keycloak docs have to say about Roles -
Roles identify a type or category of user. Admin, user, manager, and employee are all typical roles that may exist in an organization. Applications often assign access and permissions to specific roles rather than individual users as dealing with users can be too fine grained and hard to manage.
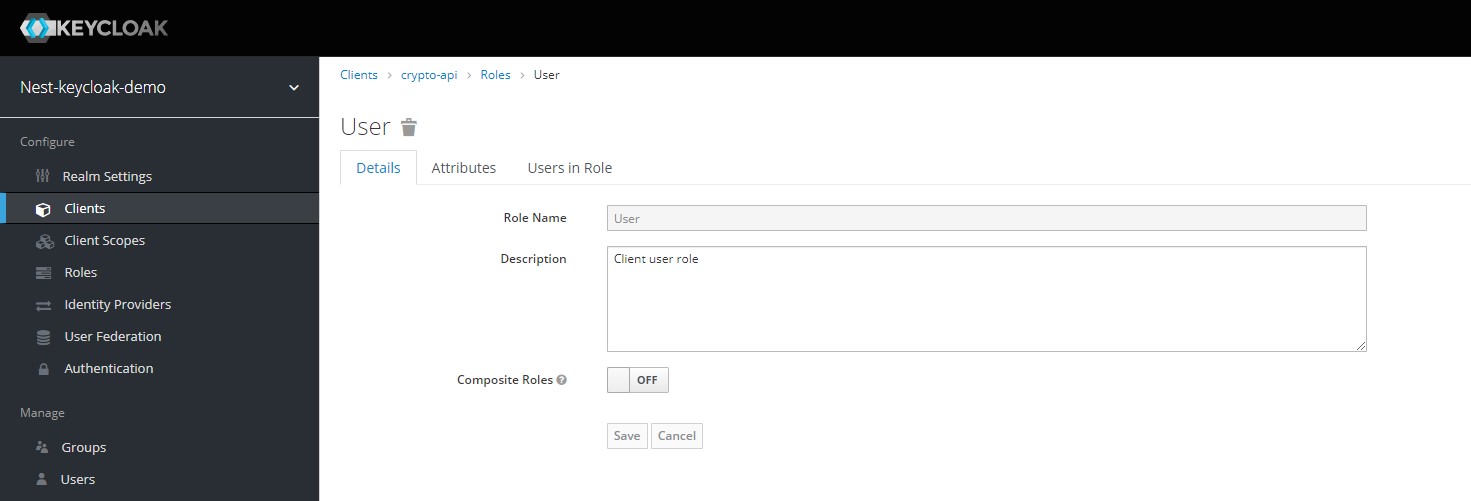
We will now create the Admin and User roles at the client level by clicking on the Add Role button on the clients page and then filling out the form before clicking save.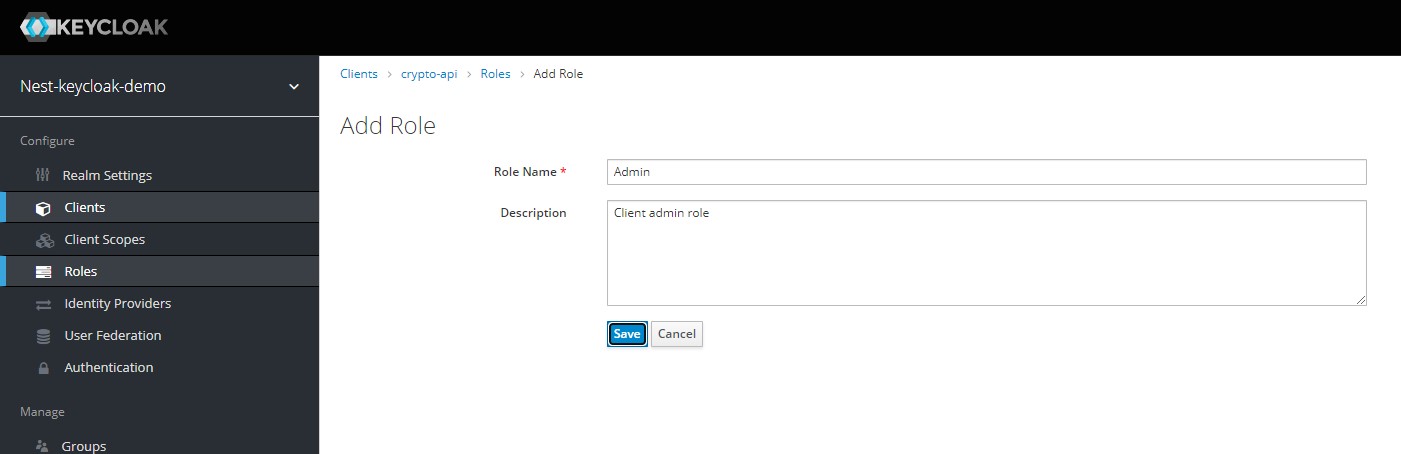
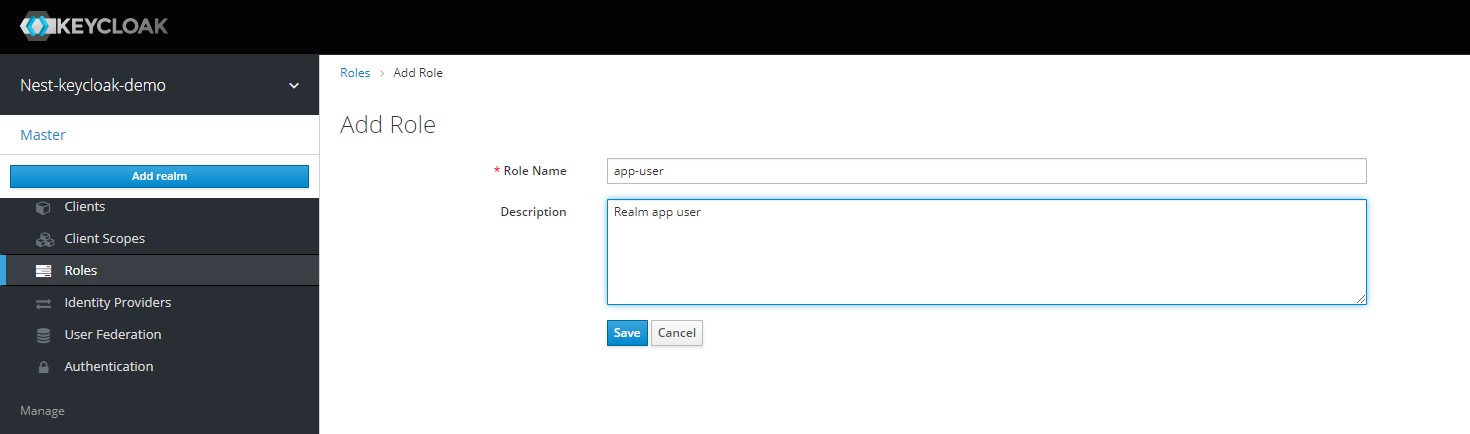
Now its time to add some Realm level roles. Navigate to the Roles section in the left navigation menu, and click on the Add Roles button. We can now add two Realm level roles called app-user & app-admin.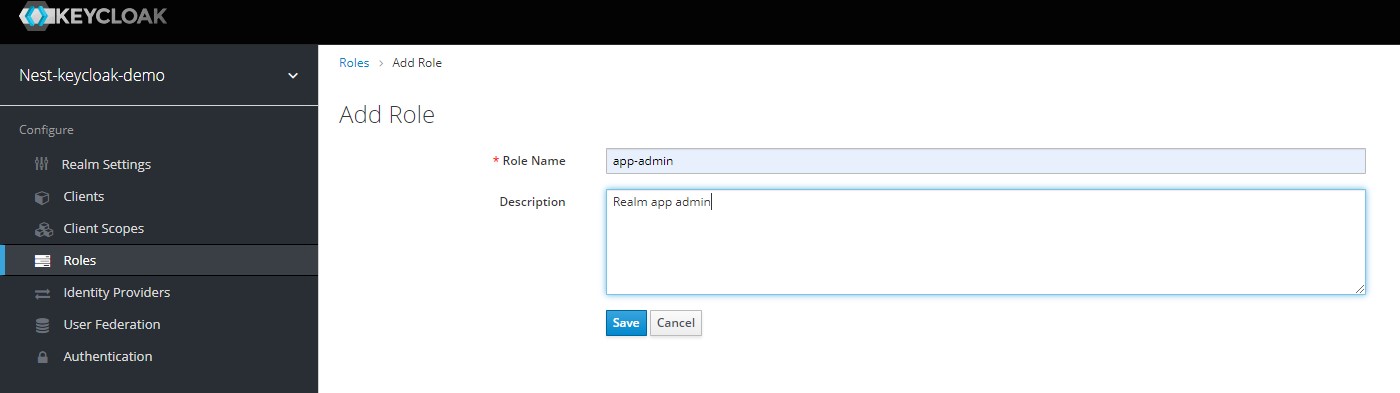
We can now finally dive into Composite Roles. This is what the keycloak documentation on Composite Roles has to say -
Any realm or client level role can become a composite role. A composite role is a role that has one or more additional roles associated with it. When a composite role is mapped to a user, the user gains the roles associated with the composite role. This inheritance is recursive so users also inherit any composite of composites. However, we recommend that composite roles are not overused.
Open the app-admin role and enable the Composite Roles toggle for it. We can now select the client level roles we want to enable for this realm role. Select the Admin role from the crypto-api client and click Add Selected.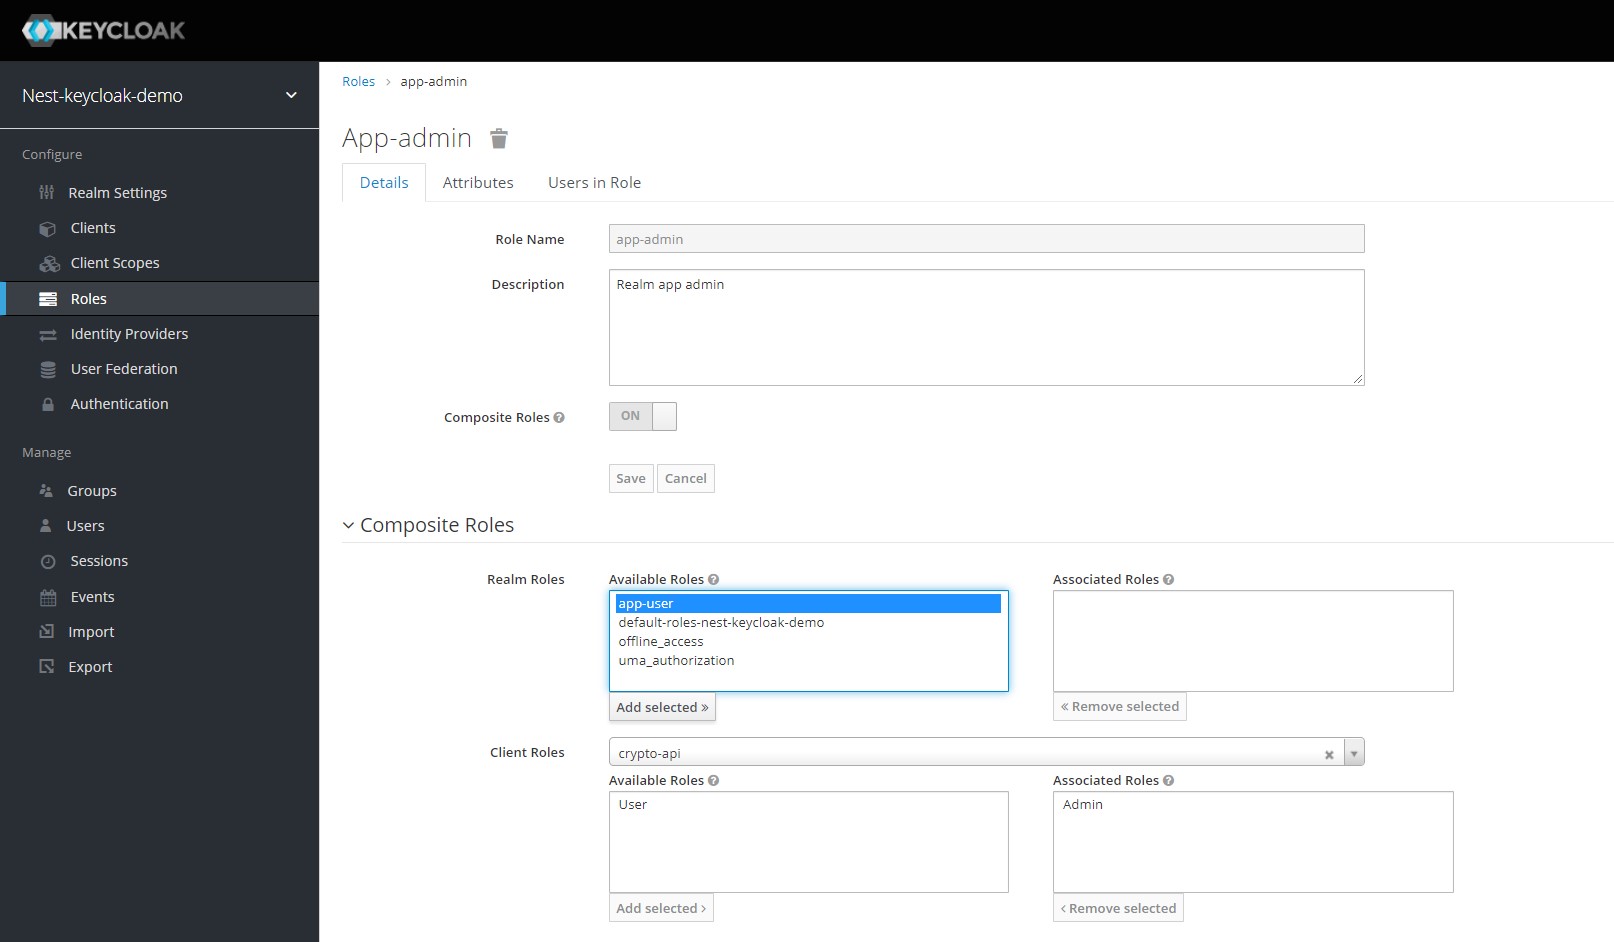
Now repeat the same process for the app-user and add the User role to it.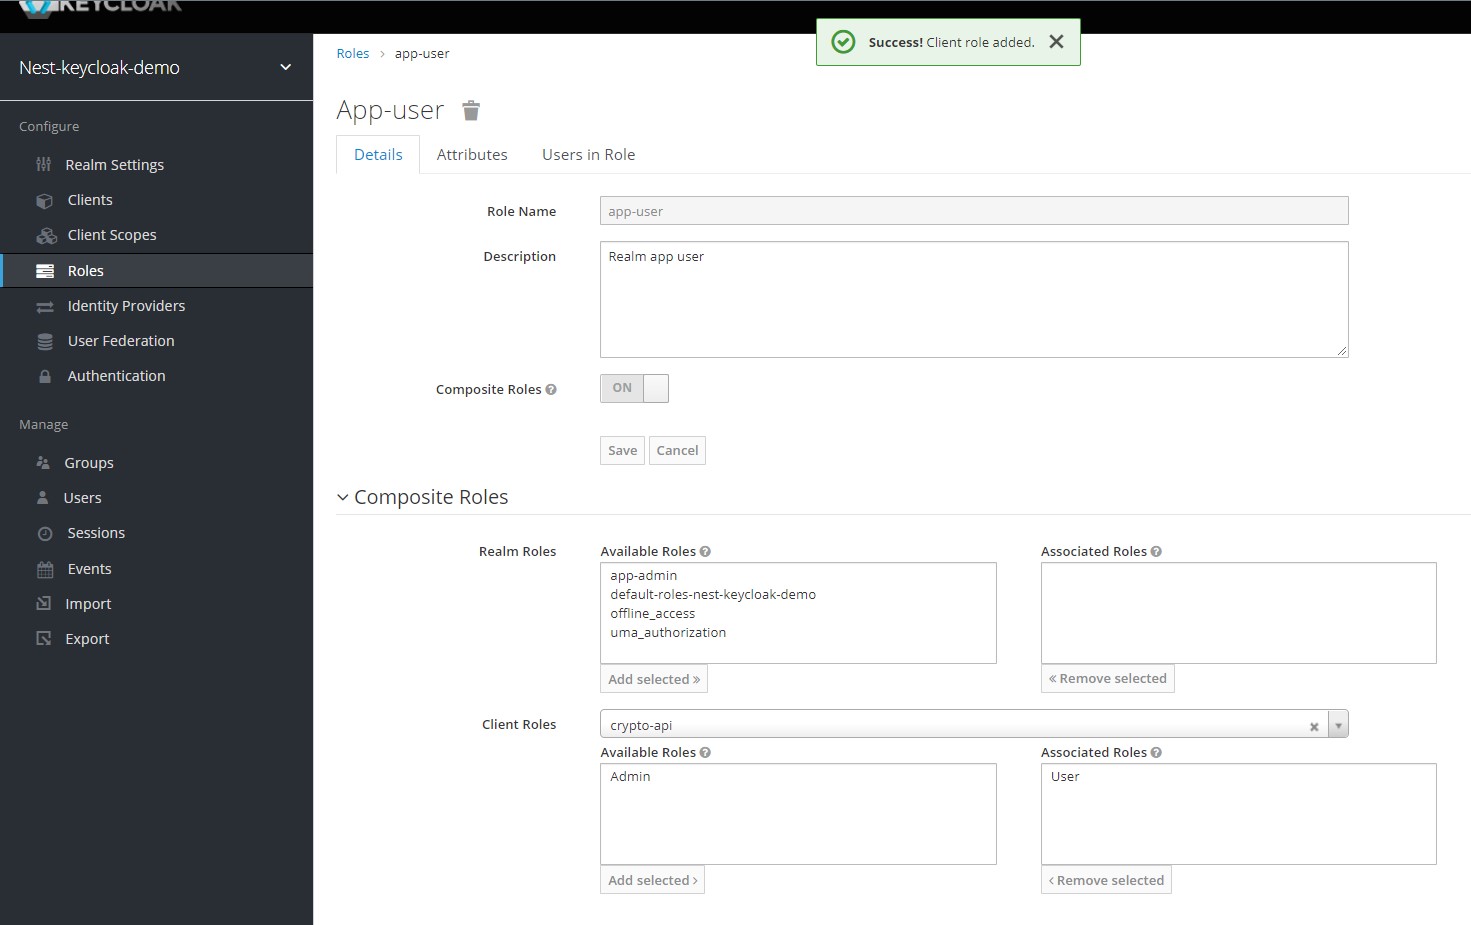
4. Adding Users to Keycloak
According to the Keycloak docs Users are entities that are able to log into your system. They can have attributes associated with themselves like email, username, address, phone number, and birth day. They can be assigned group membership and have specific roles assigned to them.
Our aim here will be to create three users with the following realm roles assigned to them -
- Bob : app-user
- Alice : app-admin
- Charlie : app-user, app-admin
Select the Users setion from the side menu to open up the users page. On this page, click the Add User button to add a new user.
Fill in the username as Alice and click Save. On the user details page, navigate to the Credentials section and enter a new password for her. For now we can just enter test@123.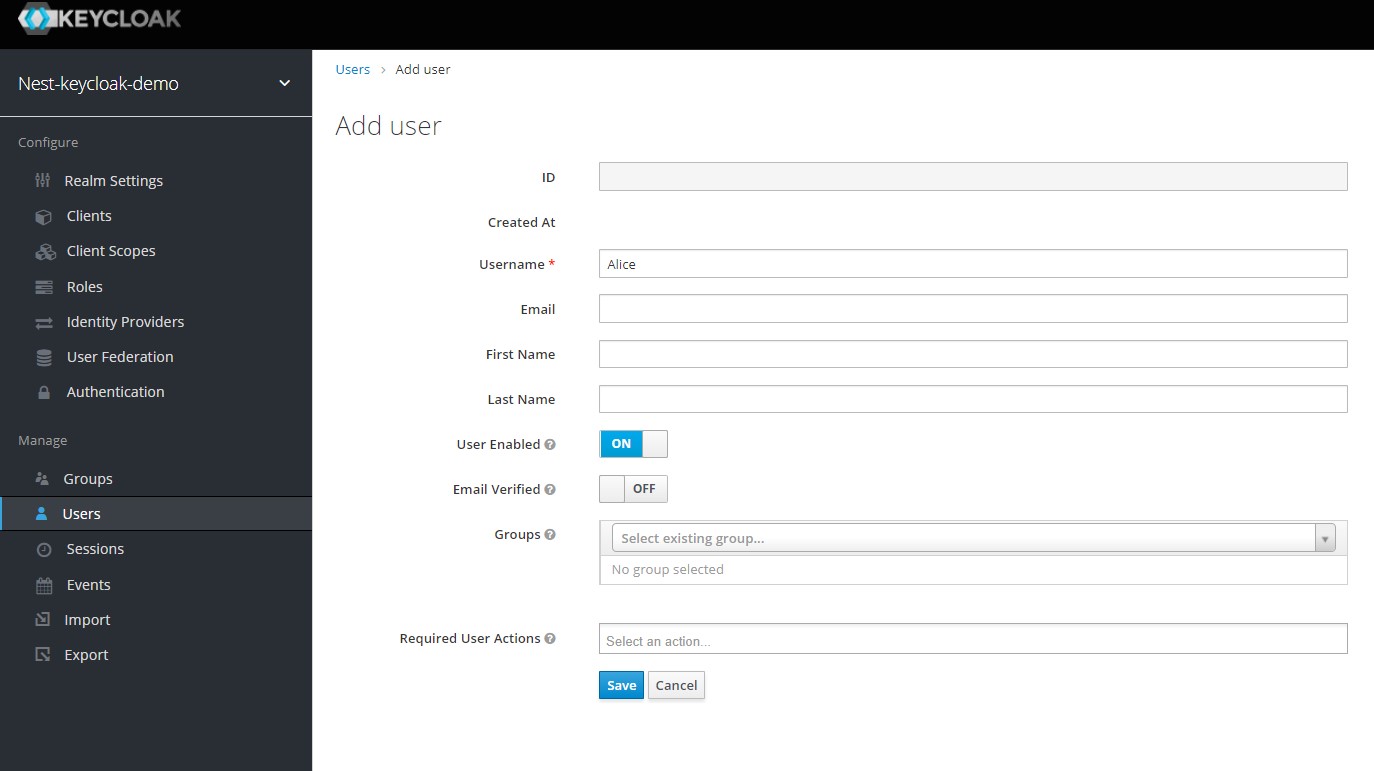
You will now be redirected to the user details screen where you can set the different details of the user. Click the Credentials tab at the top and enter a new password for Alice.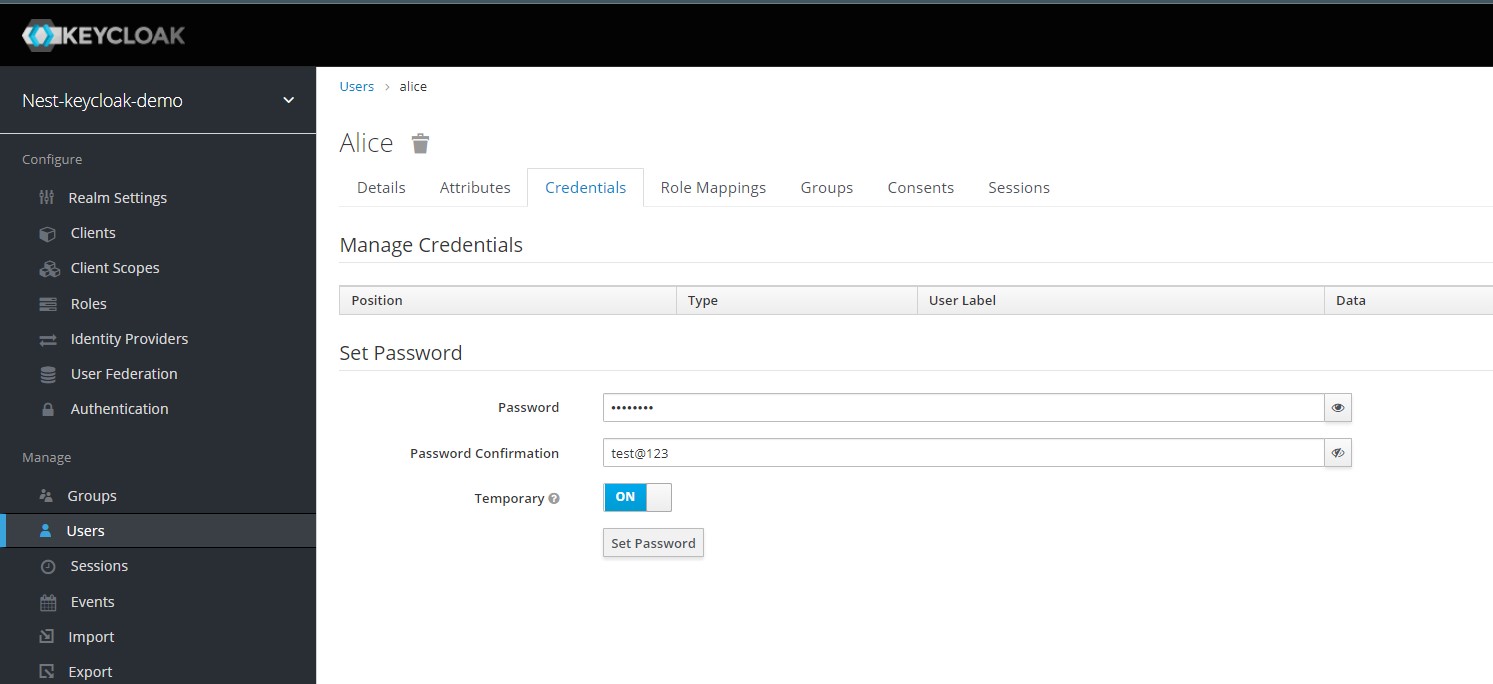
With the password set for Alice, we finally set the roles for her. Click the Role Mappings tab at the top and select the app-user role along with the default-roles options and click Add Selected.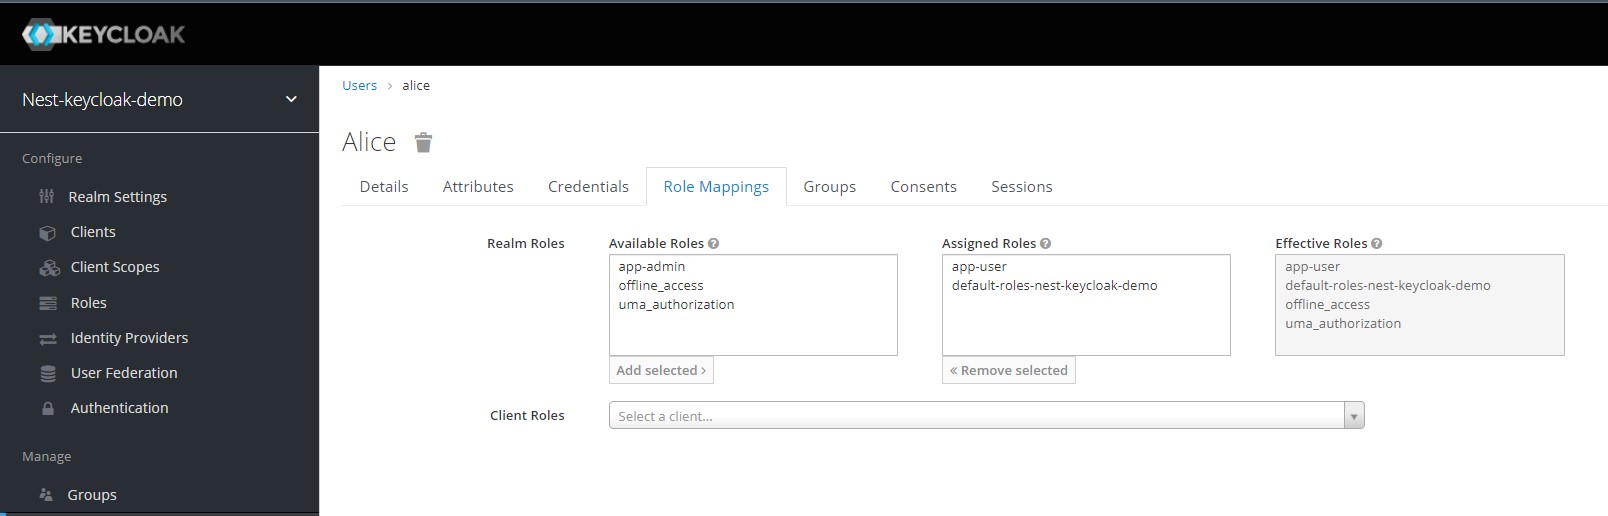
Repeat the process for Bob and Charlie and give them the appropriate roles.
Integrating Keycloak authentication into our app
With our Keycloak server configured, roles prepped and users created we can finally begin integrating our Authentication server with our app using an adapter.
A Keycloak client adaper is a library that makes it very easy to secure applications and services with Keycloak. They are called ‘‘adapters’’ rather than libraries as they provide a tight integration to the underlying platform and framework. This makes adapters easy to use & lets us avoid the boiler plate which is common with libraries.
Start off by installing the adapter for NestJS called nest-keycloak-connect as well as its peer dependency keycloak-connect -
yarn add nest-keycloak-connect keycloak-connect
With the adapter installed, we being adding the config to our app by editing the app.module.ts file. The client id can be found in the Settings section of the client we created and the Secret can be found in the Credentials section. In case you don't see a secret, just regenerate it using the button.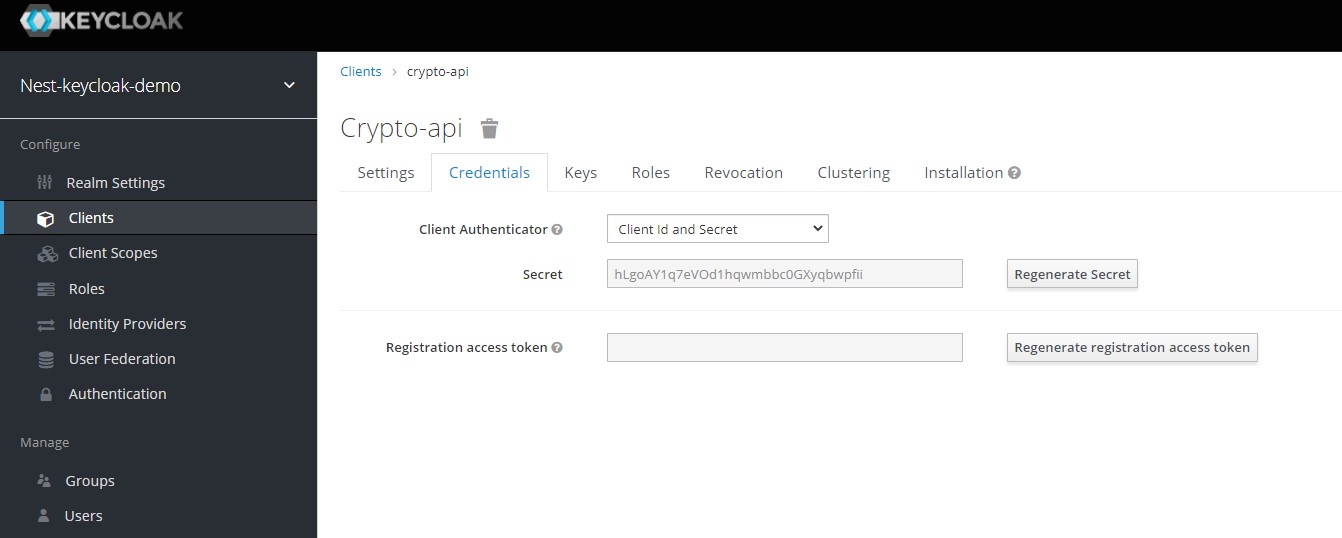
...
@Module({
  imports: [
    KeycloakConnectModule.register({
      authServerUrl: 'http://localhost:8888/auth',
      realm: 'nest-keycloak-demo',
      clientId: 'crypto-api',
      secret: 'hLgoAY1q7eVOd1hqwmbbc0GXyqbwpfii',
      logLevels: ['error'],
      policyEnforcement: PolicyEnforcementMode.ENFORCING,
      tokenValidation: TokenValidation.OFFLINE,
    }),
  ],
  controllers: [AppController],
  providers: [
    AppService,
    {
      provide: APP_GUARD,
      useClass: AuthGuard, // Global Authentication Guard
    },
    {
      provide: APP_GUARD,
      useClass: RoleGuard, // Global Role Guard
    },
  ],
})